
[et_pb_section fb_built=”1″ _builder_version=”4.27.4″ _module_preset=”default” custom_padding=”5px||0px|||” global_colors_info=”{}”][et_pb_row _builder_version=”4.27.4″ _module_preset=”default” custom_padding=”15px||12px|||” global_colors_info=”{}”][et_pb_column type=”4_4″ _builder_version=”4.27.4″ _module_preset=”default” global_colors_info=”{}”][et_pb_text _builder_version=”4.27.4″ _module_preset=”default” global_colors_info=”{}”]
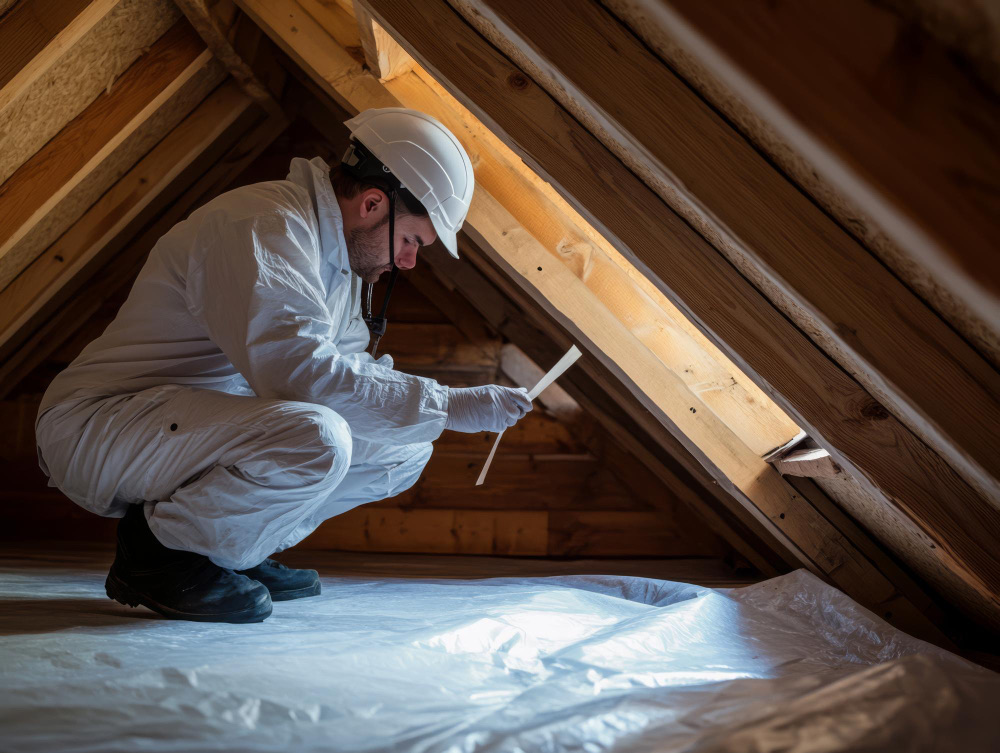
Spray foam insulation must be removed from walls and ceilings occasionally, either while repairing or remodeling. The material used for spray foam insulation can be harmful to your health. You may inhale some of the material or expose it upon contact with bare skin. Thus, you must take some precautions to protect yourself and your property from the potential hazards. Furthermore, you must know what safety gear you must wear while handling this material and its proper disposal measures.
The following are the required safety equipment for safely disposing of polyurethane spray foam insulation: work gloves, safety goggles, long-sleeved shirt, long pants, boot covers, head cover and mask, and step-by-step instructions. Spray foam insulation is commonly used in air sealing applications. Sometimes, we need to remove the seal from the sprayed area for remodeling or repair. When spraying, the foam spreads over the surface, making it difficult to remove. Here are the detailed steps to remove the spray from insulation. In the next section, we will guide you on how to safely dispose of the waste after removal.
In this guide, we will go through each step to safely remove spray foam insulation from walls and ceilings. Using step-by-step instructions to explain the process of how to remove closed-cell or open-cell spray foam insulation from a wall or ceiling. This guide gives solutions to commonly asked questions. You don’t get to talk to the contractors before starting a project? Feel free to ask any questions.
[/et_pb_text][et_pb_text _builder_version=”4.27.4″ _module_preset=”default” global_colors_info=”{}”]
Understanding Spray Foam Insulation
[/et_pb_text][/et_pb_column][/et_pb_row][/et_pb_section][et_pb_section fb_built=”1″ _builder_version=”4.27.4″ _module_preset=”default” custom_padding=”5px||0px|||” global_colors_info=”{}”][et_pb_row _builder_version=”4.27.4″ _module_preset=”default” custom_padding=”15px||12px|||” global_colors_info=”{}”][et_pb_column type=”4_4″ _builder_version=”4.27.4″ _module_preset=”default” global_colors_info=”{}”][et_pb_text _builder_version=”4.27.4″ _module_preset=”default” global_colors_info=”{}”]
Spray foam insulation combines two separate products into one adhesive foam affordable insulation system. This insulation often consists of polyurethane sprayed over walls and floors. It can strengthen homes and make them more energy-efficient due to the airtight seal it creates. Two types of foam are typically used for insulation: closed-cell foam with a high R-value of about 6.5 per inch and open-cell foam with an R-value between 3.5 and 3.6. The insulation is frequently used inside walls and beneath floors made of concrete and slabs, and is especially beneficial in air sealants and reducing noise. While it is a fantastic insulator, spray foam insulation is entirely different from foam boards and sub-slab insulation. Therefore, it should be placed only where mentioned.
[/et_pb_text][et_pb_text _builder_version=”4.27.4″ _module_preset=”default” global_colors_info=”{}”]
Types
[/et_pb_text][/et_pb_column][/et_pb_row][/et_pb_section][et_pb_section fb_built=”1″ _builder_version=”4.27.4″ _module_preset=”default” custom_padding=”5px||0px|||” global_colors_info=”{}”][et_pb_row _builder_version=”4.27.4″ _module_preset=”default” custom_padding=”15px||12px|||” global_colors_info=”{}”][et_pb_column type=”4_4″ _builder_version=”4.27.4″ _module_preset=”default” global_colors_info=”{}”][et_pb_text _builder_version=”4.27.4″ _module_preset=”default” global_colors_info=”{}”]
• Closed-Cell Foam: This foam is denser and more resistant to air and water because it is made up of tiny cells that make it hard. As a result, it is ideal for basement walls, as well as exterior walls, roofs, and unvented attic ceilings. Standard 2×4 walls can carry R-13 with 23 cm of insulation.
• Open-Cell Foam: This lighter foam is made up of fewer cells that allow air and moisture to pass through. It is used in interior applications such as stud walls and crawl spaces since it provides an effective air barrier. It is an effective solution for under 7.5 cm of insulation.
[/et_pb_text][et_pb_text _builder_version=”4.27.4″ _module_preset=”default” global_colors_info=”{}”]
Removal Hazards
[/et_pb_text][/et_pb_column][/et_pb_row][/et_pb_section][et_pb_section fb_built=”1″ _builder_version=”4.27.4″ _module_preset=”default” custom_padding=”5px||0px|||” global_colors_info=”{}”][et_pb_row _builder_version=”4.27.4″ _module_preset=”default” custom_padding=”15px||12px|||” global_colors_info=”{}”][et_pb_column type=”4_4″ _builder_version=”4.27.4″ _module_preset=”default” global_colors_info=”{}”][et_pb_text _builder_version=”4.27.4″ _module_preset=”default” global_colors_info=”{}”]
Improper spray foam removal can have serious consequences. The insulation’s half-life is anywhere between 80 to 100 years; it is a close-to-perpetual offender. Over time, the melted foam can irritate the skin and eyes, and it can endanger human health by releasing isocyanate fumes, which can lead to asthma. In addition, in case of improper disposal, the substance could pollute land and water resources, as it is considered hazardous waste. Spray foam insulation de-installation can also cause structural damage to the house, such as scraping, tearing apart, and breaking the concrete or plaster-derived house wall. Additionally, the costs of hiring professionals to do the job are not cheap. Therefore, it is crucial to have a well-planned strategy before removing the material from houses for health and environmental safety.
[/et_pb_text][et_pb_text _builder_version=”4.27.4″ _module_preset=”default” global_colors_info=”{}”]
Types of Spray Foam Insulation
[/et_pb_text][/et_pb_column][/et_pb_row][/et_pb_section][et_pb_section fb_built=”1″ _builder_version=”4.27.4″ _module_preset=”default” custom_padding=”5px||0px|||” global_colors_info=”{}”][et_pb_row _builder_version=”4.27.4″ _module_preset=”default” custom_padding=”15px||12px|||” global_colors_info=”{}”][et_pb_column type=”4_4″ _builder_version=”4.27.4″ _module_preset=”default” global_colors_info=”{}”][et_pb_text _builder_version=”4.27.4″ _module_preset=”default” global_colors_info=”{}”]
Spray foam insulation comes in a variety of forms, but the two most common types are closed-cell spray foam and open-cell spray foam. Closed-cell insulation is generally used in homes’ crawl spaces, basements, or as wall insulation rather than in attics. Available in high density and medium density, closed-cell spray foam is more expensive than open-cell. It serves as an air barrier and has a vapor-retarder class rating, which makes it highly resistant to moisture. Open-cell spray foam, however, can be used in any area, including attics and walls. Unlike closed-cell foam, open foam has a lower density and higher expansion rate, which makes it softer. It is also less expensive than other types of foam insulation. Moreover, open-cell spray foam is vapor permeable, so it is resistant to moisture. That being said, if water seeps into a wall cavity, the foam will absorb the water and wick it away, which can be seen as a deterrent to efflorescence.
Both open-cell and closed-cell spray foam have a high R-value, which measures its resistance to heat and contributes to high levels of thermal resistance. In general, closed-cell spray foam has the highest R-value, indicating its excellent insulation properties. Moreover, both types of spray foam have different safety protocols when removed. Closed-cell spray foam is known for being structurally rigid, allowing it to support its own weight as well as additional loads. On the other hand, open-cell spray foam is more flexible and expands, but it requires a support system for long-term stability. Having this knowledge can assist a certified spray foam removal therapist in the inspection process.
[/et_pb_text][et_pb_text _builder_version=”4.27.4″ _module_preset=”default” global_colors_info=”{}”]
Hazards of Improper Removal
[/et_pb_text][/et_pb_column][/et_pb_row][/et_pb_section][et_pb_section fb_built=”1″ _builder_version=”4.27.4″ _module_preset=”default” custom_padding=”5px||0px|||” global_colors_info=”{}”][et_pb_row _builder_version=”4.27.4″ _module_preset=”default” custom_padding=”15px||12px|||” global_colors_info=”{}”][et_pb_column type=”4_4″ _builder_version=”4.27.4″ _module_preset=”default” global_colors_info=”{}”][et_pb_text _builder_version=”4.27.4″ _module_preset=”default” global_colors_info=”{}”]
The hazards of spray foam removal Improper removal of flammable or combustible spray insulation can lead to physical and chemical hazards. Physical hazards range from falls, trips, and heavy lifting when transferring bags to the ground when cut and bagged. Improper lifting could lead to cuts or punctures from ceiling or wall edges. Using authorised equipment to prevent falls and to access the work area in ceilings is a must. When using surgical knives to cut out spray foam, the process can result in numerous cuts, so proper protective equipment should be used. Proper entry and egress should be cleaned and disposed of in a lockable container.
Chemical hazards can also occur during the removal process. Level A full-faced air-purifying respirators, fit-tested, should be worn while on site, and other personal protective equipment should be worn until the confined space protocol is followed. When removing the foam and material, the foam should be wet during the removal process. The removal process can release dust containing either isocyanates or amine catalysts, depending on the type of foam applied in the home. Inhalation of these dusts and gases can be harmful to an untrained individual; the hazard lies in the toxicity of the gases and can potentially lead to unconsciousness and death. Improper removal can also cause structural damage to a home, which in the end could result in a hefty charge to the homeowner. Mistakes happen; in a bad removal process, cuts in the ceiling or floorboards could potentially be damaged. It is essential for the contractor or individual to be trained to avoid these mistakes.
[/et_pb_text][et_pb_text _builder_version=”4.27.4″ _module_preset=”default” global_colors_info=”{}”]
Safety Precautions
[/et_pb_text][/et_pb_column][/et_pb_row][/et_pb_section][et_pb_section fb_built=”1″ _builder_version=”4.27.4″ _module_preset=”default” custom_padding=”5px||0px|||” global_colors_info=”{}”][et_pb_row _builder_version=”4.27.4″ _module_preset=”default” custom_padding=”15px||12px|||” global_colors_info=”{}”][et_pb_column type=”4_4″ _builder_version=”4.27.4″ _module_preset=”default” global_colors_info=”{}”][et_pb_text _builder_version=”4.27.4″ _module_preset=”default” global_colors_info=”{}”]
Section Summary These resources are aimed at protecting the individual and the environment from a harmful work environment. It involves many elements, from one individual using gloves to creating a safe working environment. Preparing a work environment should not be rushed; equipment should be set up, and all elements should be considered, such as the height and make of the equipment and how you are going to dispose of the insulation. This section is recommended for research and study before carrying out the renovation of insulation.
Personal Protective Equipment Personal protective equipment (PPE) is crucial in minimising exposure to any harmful materials, such as chemicals, adhesives, and dirt. The following list recommends gear required for safe spray foam removal; however, if you can, it may be beneficial to upgrade some of this gear. Supplied air respirator with approved canisters: A full respirator is preferable. At the very least, use a half respirator. Make sure the cartridges are available in your area and properly rated for your work.
Tear-resistant gloves: Ensure that the gloves provide a form of insulation or barrier against the potential of a reaction if the resin comes into contact with your skin. I suggest using nitrile gloves. The nitrile gloves will also provide a level of protection from the adhesive on the insulation bags. Ensure you have insulated gloves for the actual work as well.
Insulated gloves: Required for the handling of wet or frozen insulation.
Full-body suit: This suit should have a hood and be either made from a tear-resistant material or treated with a coating to prevent tearing. This suit should also be water-resistant.
Eye protection: Eye protection could take the form of goggles, a full wrap-around, or even a full-face shield.
Insulating rubber boots or over boots: Over boots are available, and it may be beneficial to wear these over the insulated boots.
[/et_pb_text][/et_pb_column][/et_pb_row][/et_pb_section][et_pb_section fb_built=”1″ _builder_version=”4.27.4″ _module_preset=”default” custom_padding=”5px||0px|||” global_colors_info=”{}”][et_pb_row _builder_version=”4.27.4″ _module_preset=”default” custom_padding=”15px||12px|||” global_colors_info=”{}”][et_pb_column type=”4_4″ _builder_version=”4.27.4″ _module_preset=”default” global_colors_info=”{}”][et_pb_text _builder_version=”4.27.4″ _module_preset=”default” global_colors_info=”{}”]
Personal Protective Equipment (PPE)
[/et_pb_text][et_pb_text _builder_version=”4.27.4″ _module_preset=”default” global_colors_info=”{}”]
During the removal of spray foam from walls and ceilings, always ensure you are protecting yourself. This means personal protective equipment (PPE). Because the abrasive, sharp, and potentially hazardous chemicals are dangerous for your hands, wear work gloves. Nitrile gloves are suitable, for example. During a removal job, dust and particles—hazardous substances—may spread through the air. For this reason, always use respiratory protection. You can wear face masks or a dust mask. Depending on the amount of dust, it is better to wear a facemask. The wear time for this mask is limited and varies from a few seconds to a few hours. For small jobs, a facemask is more suitable and effective. Staff members who are wearing dust masks can also use a blower and/or vacuum cleaner.
In many cases, irritating materials in the eyes are also a risk. To protect your eyes sufficiently, it’s advisable to wear work goggles. Make sure the facemask, dust masks, work goggles, and work gloves have the necessary markings, which indicate they have been tested and are safe. Always choose your personal protective equipment based on the harmful substances or quality of the job and follow the instructions for use. Pay attention to the instructions for using the dust mask(s). When using a dust mask, for example, it is essential to have a mask size that matches your face—not too big and not too small. Be aware that the instructions for use change and that the expiration dates may differ per production batch. Respiratory protection, such as masks and dust masks, will not protect your surroundings, clients, or anyone else from inhaling hazardous substances. For this, approximately one meter of your nose and mouth is covered. If applicable and necessary, a fume hood must also be used. When using PPE, ensuring a good seal is essential for it to work properly. Given the damage to health that may occur, always wear respiratory protection in work situations involving hazardous substances to prevent dust, particles, solvent vapors, and fumes from being inhaled. Never neglect the risk of this, even if it is likely the job will take only a short time. Always ensure good ventilation when removing spray foam. Keep windows and doors open when working and use a blower. You can also use a vacuum cleaner, personal dust extractor, or a professional vacuum cleaner.
[/et_pb_text][/et_pb_column][/et_pb_row][/et_pb_section][et_pb_section fb_built=”1″ _builder_version=”4.27.4″ _module_preset=”default” custom_padding=”5px||0px|||” global_colors_info=”{}”][et_pb_row _builder_version=”4.27.4″ _module_preset=”default” custom_padding=”15px||12px|||” global_colors_info=”{}”][et_pb_column type=”4_4″ _builder_version=”4.27.4″ _module_preset=”default” global_colors_info=”{}”][et_pb_text _builder_version=”4.27.4″ _module_preset=”default” global_colors_info=”{}”]
Ventilation
[/et_pb_text][et_pb_text _builder_version=”4.27.4″ _module_preset=”default” global_colors_info=”{}”]
Having a well-ventilated workspace benefits you in several ways. During insulation removal, a ceiling fan or floor fan is an efficient ventilation method. When doors and windows are opened, convection also becomes effective. Any dust or harmful fumes from the removal process will be sucked out of the workspace and replaced with fresh air. Without air circulation, re-entrained dust and fumes build up in the workspace, creating additional hazards. Volatile organic compounds off-gas when the harmful fumes from the spray foam are exacerbated by sanding, heating, or the use of chemicals. The more time and effort put into air movement, the safer it becomes. Consider taking breaks in the morning and the evening if you have space to work in a ventilated environment for a long time. The ventilation can replace air during the break time. Local exhaust ventilation systems are available, but mechanical systems, such as air scrubbers or HEPA filters, may be required. Personal protective equipment is always recommended.
Remember to plan adequate ventilation before, during, and after the insulation removal process. While wearing protective equipment, consistently monitor the ventilation throughout the removal process. Continue to use protective equipment and ventilation until vapor levels are completely reduced. With expanding vapor build-up, recognising and reacting to rising health risks can become the difference between life and death. The earlier a professional can leave the job because of ventilation issues, the less likely they will become seriously sick. When there isn’t enough ventilation, the danger is high. The importance of proper ventilation must be emphasized.
[/et_pb_text][/et_pb_column][/et_pb_row][/et_pb_section][et_pb_section fb_built=”1″ _builder_version=”4.27.4″ _module_preset=”default” custom_padding=”5px||0px|||” global_colors_info=”{}”][et_pb_row _builder_version=”4.27.4″ _module_preset=”default” custom_padding=”15px||12px|||” global_colors_info=”{}”][et_pb_column type=”4_4″ _builder_version=”4.27.4″ _module_preset=”default” global_colors_info=”{}”][et_pb_text _builder_version=”4.27.4″ _module_preset=”default” global_colors_info=”{}”]
Tools and Materials Needed
[/et_pb_text][et_pb_text _builder_version=”4.27.4″ _module_preset=”default” global_colors_info=”{}”]
Manual tools and chemicals: A. Mechanical means – insulation is removed by physical force exerted by the user on the material. Typical tools used in this process include:
1. Scrapers
2. Utility knives B. Chemical means – applied chemical action. When using chemical solvents, it’s important to refer to the insulation manufacturer guidelines to select an appropriate chemical solvent.
Do not use flammable substances or solvents that may act as a combustible medium. Additional required items include: bags or containers for waste materials with lids or safety latches, and tarps or poly to protect the workspace in case the insulation gains entry to the area during extraction. If mechanical tools due to perform negative air pressure cannot be used, consider the use of a commercial wet/dry vacuum with a HEPA filter to remove the insulation. Before you begin using tools and chemicals, you will need to select the right tools for the job and the right chemicals, if necessary. High-quality tools make the job quicker and reduce the chance of accidents. Manual methods of insulation removal make use of mechanical or chemical means. Cutting off beads of foam, shaving, wire cutting, and the use of a hot-wire saw are all mechanical applications. Foams that are difficult to remove can be treated with polyurethane materials that soften the foam and make it easier to cut. Every type of foam has its own characteristics, so the removal process may vary according to type.
[/et_pb_text][/et_pb_column][/et_pb_row][/et_pb_section][et_pb_section fb_built=”1″ _builder_version=”4.27.4″ _module_preset=”default” custom_padding=”5px||0px|||” global_colors_info=”{}”][et_pb_row _builder_version=”4.27.4″ _module_preset=”default” custom_padding=”15px||12px|||” global_colors_info=”{}”][et_pb_column type=”4_4″ _builder_version=”4.27.4″ _module_preset=”default” global_colors_info=”{}”][et_pb_text _builder_version=”4.27.4″ _module_preset=”default” global_colors_info=”{}”]
Step-by-Step Removal Process
[/et_pb_text][et_pb_text _builder_version=”4.27.4″ _module_preset=”default” global_colors_info=”{}”]
Assess and Prepare Before you begin removing foam insulation from walls and ceilings, you must assess the area for potential roadblocks. Supplies have been gathered, and the area is free from obstacles. Furniture and appliances should all be moved or covered before removal begins. If you plan to reapply spray foam after removing it, avoid using scratchy direct-to-metal products during the removal process, because they may cut or score metal. Instead, a chemical remover may be used, or an attached tarp should be placed if using abrasion techniques.
Mechanical Removal Spray foam dissolves with heat and mechanical removal. Heat can be created by using the sharper, angular side of a razor-like blade as a paint scraper. Begin by sinking the blade into the foam and push it using a pushing and squeezing motion to make the insulation slide off the walls. XPS foam insulation is the easiest to remove, and it comes off the cleanest. Chemical strippers can also be used.
Chemical Removal Commercial products can be applied using brushes, spray bottles, or rollers. The surface foam is to be coated with up to four coats and left with each coat for two or three minutes, and then the foam will peel away. Scrape the foam off with a paint or putty knife. Also, indoor and bedroom areas have been stripped with citrus-based strippers; wipe or scrape the treated foam. Contaminated residential and commercial buildings get the dust vacuumed using a HEPA vacuum cleaner installed over the entire work area. Rinse the walls to avoid discoloration. Since the chemical reacts with sunlight, water, and air, it creates an alkaline surface soil, so the area must be rinsed down to remove the residue. Run-off, twin scraping, and double scrape techniques can be combined with foam. To do the twin, spray foam remover is sprayed on the foam and allowed to stay until the foam starts to dissolve. During warm weather days, the citrus-based stripper can be wiped off with a damp cloth and then rinsed; during the colder days, it must be power rinsed, scraped, and rinsed. Common problems and best practices regarding the removal process for each technique are detailed below.
[/et_pb_text][/et_pb_column][/et_pb_row][/et_pb_section][et_pb_section fb_built=”1″ _builder_version=”4.27.4″ _module_preset=”default” custom_padding=”5px||0px|||” global_colors_info=”{}”][et_pb_row _builder_version=”4.27.4″ _module_preset=”default” custom_padding=”15px||12px|||” global_colors_info=”{}”][et_pb_column type=”4_4″ _builder_version=”4.27.4″ _module_preset=”default” global_colors_info=”{}”][et_pb_text _builder_version=”4.27.4″ _module_preset=”default” global_colors_info=”{}”]
Assessment and Preparation
[/et_pb_text][et_pb_text _builder_version=”4.27.4″ _module_preset=”default” global_colors_info=”{}”]
Thorough assessment is crucial when preparing to start removing spray foam insulation. Before you begin, try to ensure that the workspace is clear and that an effective safety plan has been put into place. When first evaluating the region, determine if it has to be removed, if there are any hazardous substances present, and what kind of insulation exists on the job site. Creating a detailed plan of approach based on the assessment’s findings can be considerably helpful. It’s possible that spray foam is deteriorating, peeling, or growing excessively. When there’s substantial spray foam perhaps growing beyond the surface, it’s time to get it removed. Spray foam can be hard, spongy, or filled with bubbles. There are instances where it can be torn using hand tools to gain entrance. Make sure you get protective goggles, gloves, overall protection, masks, and other protective equipment before you begin removing to protect yourself from the fumes. Make sure your environment is properly ventilated, with proper protection measures in place to avoid extensive harm. The initial assessment may lead to the need to come up with a more comprehensive action plan, contingent on the circumstances discovered in surveying. You may find it beneficial to take photos of the area that may require a closer inspection to assess potential threats and challenges. Aside from serving as a reference point in the future, documenting the work site will provide contractors with ideas about whether issues may emerge.
[/et_pb_text][/et_pb_column][/et_pb_row][/et_pb_section][et_pb_section fb_built=”1″ _builder_version=”4.27.4″ _module_preset=”default” custom_padding=”5px||0px|||” global_colors_info=”{}”][et_pb_row _builder_version=”4.27.4″ _module_preset=”default” custom_padding=”15px||12px|||” global_colors_info=”{}”][et_pb_column type=”4_4″ _builder_version=”4.27.4″ _module_preset=”default” global_colors_info=”{}”][et_pb_text _builder_version=”4.27.4″ _module_preset=”default” global_colors_info=”{}”]
Mechanical Removal Techniques
[/et_pb_text][et_pb_text _builder_version=”4.27.4″ _module_preset=”default” global_colors_info=”{}”]
Mechanical removal techniques involve using physical force to clear the foam from surfaces. Any necessary materials can be found on hand or bought at affordable prices. Scrapers, saws, and chisels are best for this technique. Carefully follow the step-by-step guide to correctly utilize these tools. When scraping, try to apply the least amount of pressure necessary to clear the surface. Be gentle, as you do not want to damage the surface or structure underneath the foam. At times, it may be more appropriate to hold and angle the scraper against the material, rather than simply driving the blade into it. Apply a bit of patience, as this process can be time-consuming. Challenges remain, as some portions may stick and consequently dig too deep by accident. Patience will be a critical skill in this process. Purchase quality tools to keep them from bending.
Prepare the area of your house appropriately before scraping so that your work and living environment are not disrupted during the process. Respirators or face masks, dust sheets, and appropriate power tools should be bought or owned prior to initiating this process.
Mechanical Removal Steps: Scrape as much of the soft foam from the surfaces using disposable razors while taking care not to gouge or cause undue paint removal to the framing. You may need to use small paint brushes to remove larger portions of foam from deeper in the crevices or recessed areas. A cleaner rag or paint brush will help to remove the finer particles of the foam. Complete the removal of the foam from the floor surfaces, using an additional paint brush after the vacuum can be helpful for more appropriate cleaning methods. Always use extra caution when using this product because it can damage the substrates, and always wear appropriate gloves and a respirator. Any further touch-up should be completed with steel wool pads or knives after the process of foam removal is complete.
[/et_pb_text][/et_pb_column][/et_pb_row][/et_pb_section][et_pb_section fb_built=”1″ _builder_version=”4.27.4″ _module_preset=”default” custom_padding=”5px||0px|||” global_colors_info=”{}”][et_pb_row _builder_version=”4.27.4″ _module_preset=”default” custom_padding=”15px||12px|||” global_colors_info=”{}”][et_pb_column type=”4_4″ _builder_version=”4.27.4″ _module_preset=”default” global_colors_info=”{}”][et_pb_text _builder_version=”4.27.4″ _module_preset=”default” global_colors_info=”{}”]
Chemical Removal Techniques
[/et_pb_text][et_pb_text _builder_version=”4.27.4″ _module_preset=”default” global_colors_info=”{}”]
If the insulation is not compatible with any mechanical technique and is difficult to remove from the walls or ceilings, chemical removal methods may produce better results. Some alternatives can be used as a softener or to help remove the insulation in areas where there is a large amount of insulation in a small cavity.
Castor oil and vinegar Products like unrefined castor oil can loosen the bond between the insulation and the surfaces behind it, which makes the insulation slide off with a minimum of effort. Vinegar is an essential component of this reaction.
Petroleum-based solvents If you are going to try a petroleum-based solvent, xylene generally makes the best product. It is important to point out that xylene can dissolve a certain amount of foam, which can make a hole as it dries in a minute. Remember to keep the area well-ventilated every time you choose this product, and always wear protective gloves as a standard.
1. Carefully read the product label and apply a sufficient amount of solvent to the outside edges of the insulation in an inconspicuous place. Allow the solvent to penetrate and work for at least 24 hours.
2. Apply again to the next layer of insulation, and finally, to the backing surface.
3. If the solvent is not compatible with the insulation, apply castor oil and vinegar as mentioned earlier. Any scrap foam or paper, and even the rags you used containing dried, leftover residue of scraped insulation, must be treated as hazardous waste and disposed of properly.
Applications Chemicals can be applied with a small garden hose or with a pump-type hand spray. This must be done carefully to avoid damaging the insulation behind the foam. If you have difficulty, be aware that almost any method used will be time-consuming and may not be effective. If using a harsh solvent, use rags or sponges to catch and clean the fluid before it can damage the insulation. Always try an inconspicuous area first. When spraying, hold the nozzle as close to the foam as possible to minimise wasted material.
[/et_pb_text][/et_pb_column][/et_pb_row][/et_pb_section][et_pb_section fb_built=”1″ _builder_version=”4.27.4″ _module_preset=”default” custom_padding=”5px||0px|||” global_colors_info=”{}”][et_pb_row _builder_version=”4.27.4″ _module_preset=”default” custom_padding=”15px||12px|||” global_colors_info=”{}”][et_pb_column type=”4_4″ _builder_version=”4.27.4″ _module_preset=”default” global_colors_info=”{}”][et_pb_text _builder_version=”4.27.4″ _module_preset=”default” global_colors_info=”{}”]
Disposal of Waste Materials
[/et_pb_text][et_pb_text _builder_version=”4.27.4″ _module_preset=”default” global_colors_info=”{}”]
Step-by-Step Guide to Safely Removing Spray Foam from Walls and Ceilings – Disposal of Waste Materials
When you remove the PPE (personal protective equipment) utilised in returning your home’s walls to their former state, you should place these items in thick plastic bags. Seal these bags with duct tape, and then place them in plastic bins to keep them separate from regular waste. Label these bins clearly to indicate their hazardous contents, protecting any janitor or waste professional who needs to handle these materials down the line. You will need to organize the proper means of disposing of these materials in accordance with local regulations, as some waste facilities cannot accept these dangerous chemicals. Fortunately, numerous recycling programs exist that will diversely repurpose these materials if you are able to drop off your supplies at their centers. Additionally, you should always give away any remaining unopened materials or reuse them in another fashion for the sake of sustainability.
Before you set out to the waste facility, call ahead to make sure they will accept your waste. Oftentimes, these trips will need to be scheduled and pre-approved to ensure that you can discard these materials properly. Companies are always striving to create new sustainable materials for the construction industry that possess low toxicity and a lighter carbon footprint than spray foam insulation. Not only is it important to be aware and a good consumer, it is also crucial to be considerate of the waste your home project creates. Ensure a safe living environment for yourself and your family and for the workers you contract out by following proper disposal guidelines.
[/et_pb_text][/et_pb_column][/et_pb_row][/et_pb_section]
Need Spray Foam Removed?
Our specialists are available throughout the Midlands. Call us on 0121 663 6529 for a free survey.
Get a Free Quote